We put energy saver lightbulbs in, and have the lights on when it is dark outside. I know some people like to have them on just until they are in bed, or for a portion of the dark evening hours, but my husband often comes home very late in the night (or early in the morning) from work, so we need them on throughout the night often enough that we made that our routine.
However, it ends up being me who is the one turning them on around dusk and off when I get up in the morning, and it always seemed silly to me not to have them on a timer. Well it seemed like it would be easy to buy a timer and install it instead of the switch. And it was, but it didn't seem like it at first, let me tell you!
While my parents were visiting last week, and several months after I purchased the timer, I finally installed it. It was really nice having my dad there as backup in case I needed some advice, or wasn't sure what I was doing. He mainly stayed in the background, took some pictures, and had tea with my mom, but I appreciated the support!
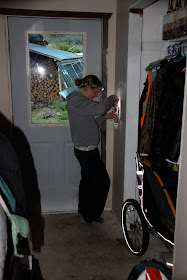
So I started by turning off the breaker for the lights, checking to make sure they were off by having both switches turned on, turning the breaker off, then making sure the lights were all out. Then I began by taking the switch cover off and removing the screws holding the two switches on. I used my headlamp to see the wires better, since I had the lights all off and it was getting dark outside.
Then I removed the switch that I was replacing and figured out which wires I would need for the timer installation. While the switch only had 2 wires, the timer needed 4 (adding a neutral & a ground).
I took my time at this stage, and took lots of pictures to show how I connected the wires with these neat extra secure joiners that my dad brought down with him. I tried to find them here in the US, but no luck. They are good because they ensure a very solid connection when you are attaching single wires with multiple strand wires that are easily broken using the twist & twist on cover method. There is a metal sleeve with a screw in the side, and you stick the 2 or more wires in the sleeve, then tighten the screw down on them. Then you twist the black cover over the sleeve and you are good to go!
When I had all the wires connected, the next step was to get enough room in the box to fit everything inside when the light switch and timer were screwed back on. This was tricky. The connectors were very bulky, and there were a lot of wires! I used my pliers and forced the wires to mesh together and fit back in the box neatly.
Then I screwed the light switch and timer back onto the box, and used the new switch cover plate that I bought especially for this spot - it has a larger opening for the timer and a smaller opening for the switch (that switch is for the entry hall light).
Then I turned the breaker back on, and followed the timer instructions to set up the on/off times to my satisfaction.
The key thing was to make room in the box to fit the large timer that takes up more space than the switch did. The other important part was to get the right wires connected, and to securely connect and cover them. It has been so nice for the last several days to not have to remember to turn the light on in the evening and off in the morning! Its surprising how simple a change it was, and I'm sure it will be saving me lots of time down the road, not to mention having one less thing to remember! Thanks Dad for your support on this one!


Very impressive! What a great idea!
ReplyDelete